Creating VMs for Kubernetes using Terraform and VMWare vSphere
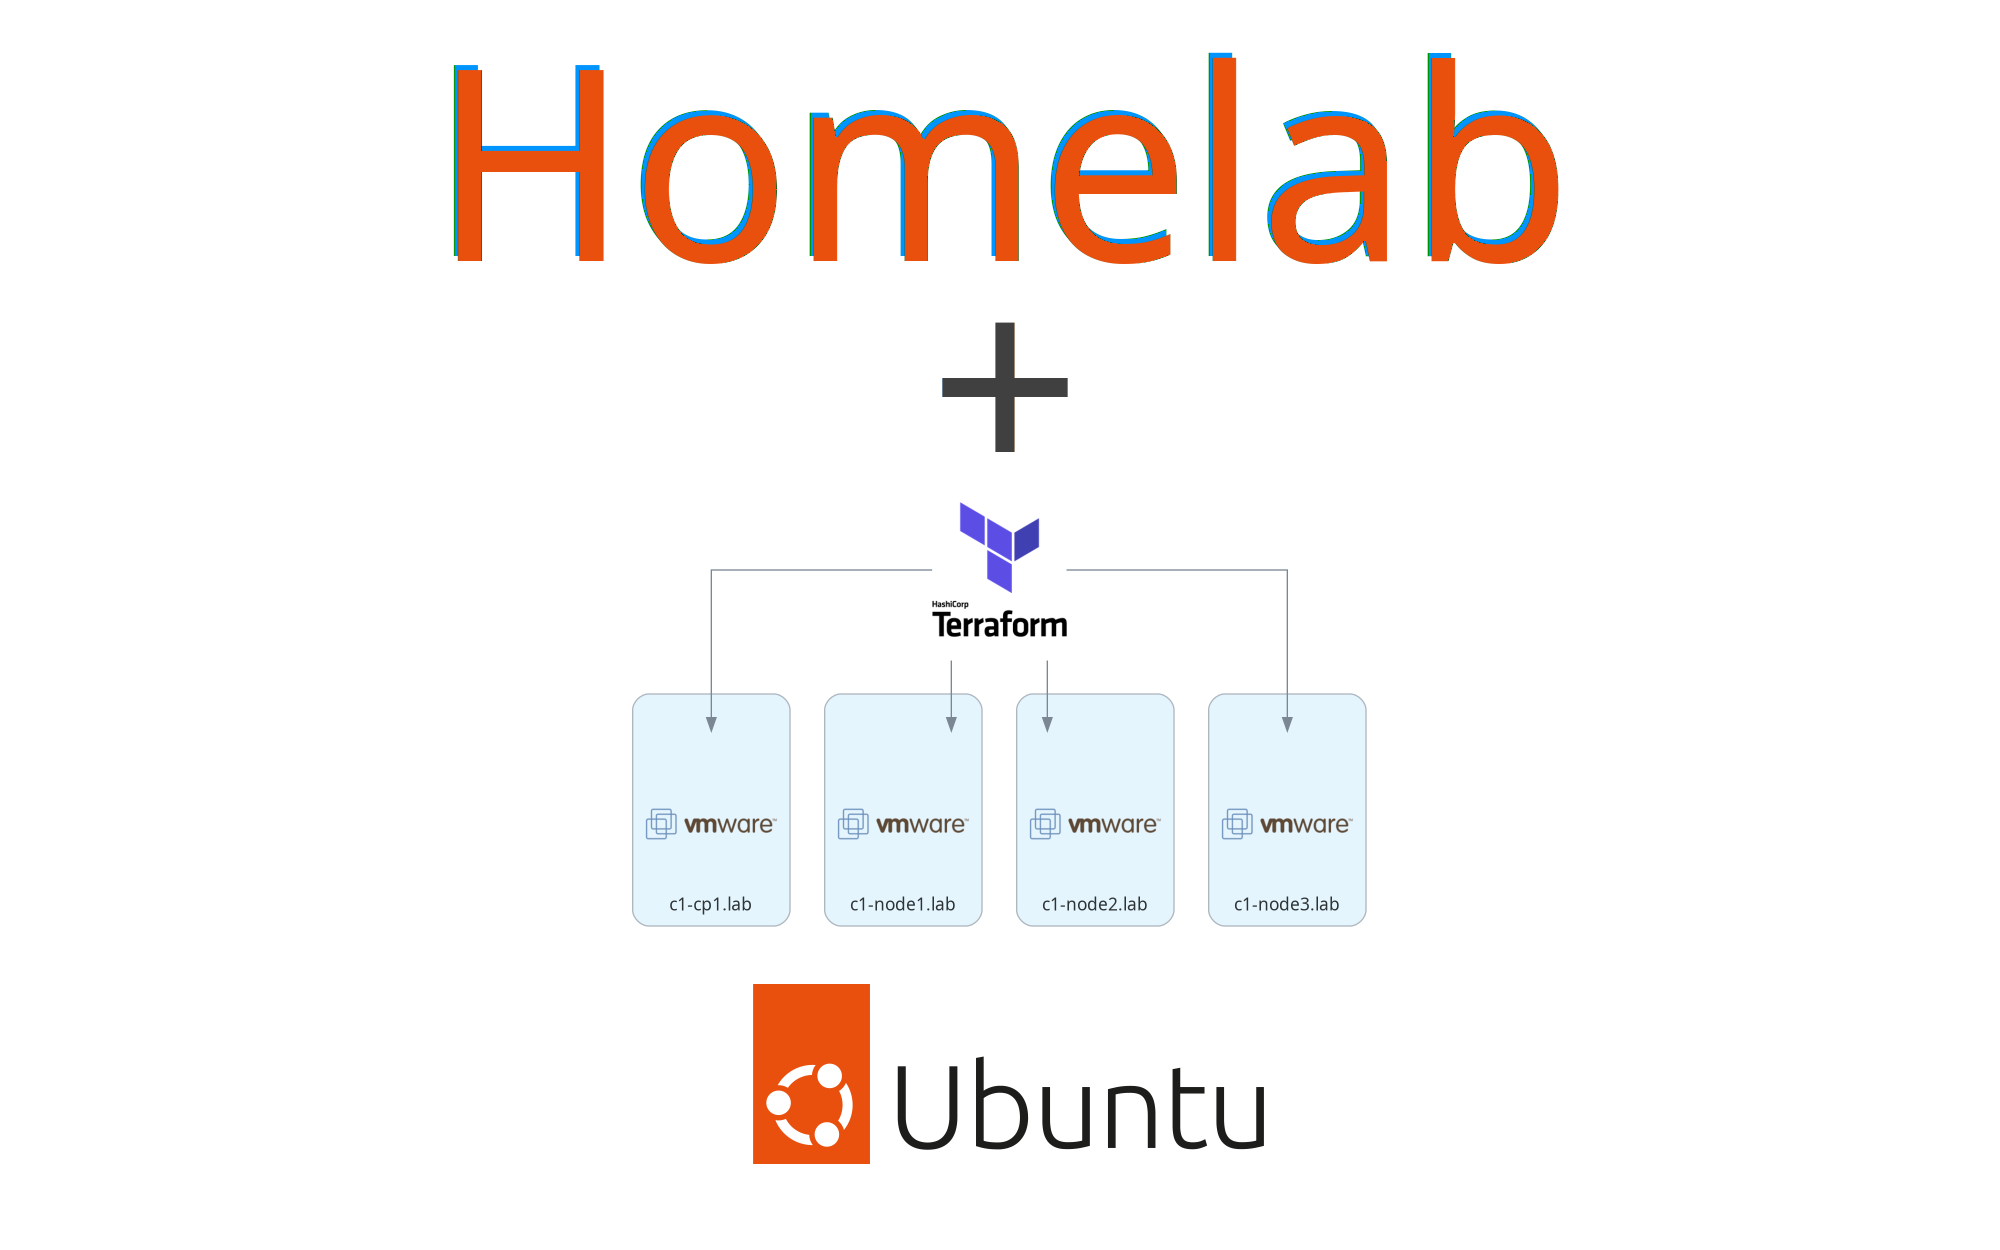
Walkthrough for creating virtual machines for a Kubernetes cluster using the vSphere terraform provider.
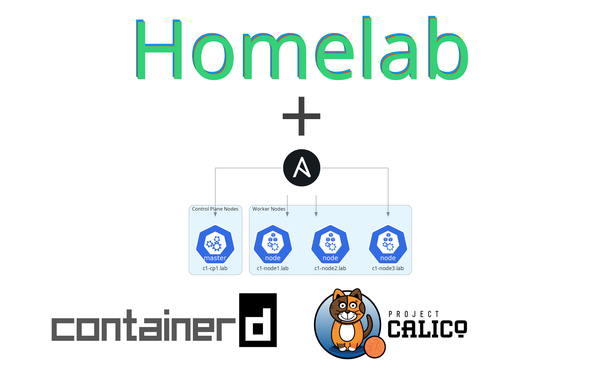
This is part 2 of a multi-part series. Part 1 is available at Using VMWare ESXi 8 and vCenter 8 in your homelab for free. Part 3 is available at Installing your Kubernetes homelab cluster in minutes with Ansible
The goal of this series
This series is for you if you are interested in making management of your homelab something more turn-key. It is also for you if you are looking for something to help get hands-on experience to move from hobby tinkering to tools used in the workplace for managing infrastructure like Kubernetes clusters.
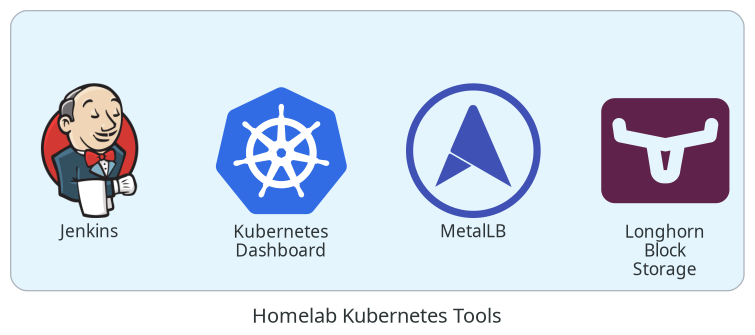
The series is an end-to-end walkthrough from installing ESXi on bare metal up to having homelab tools (Jenkins, Kubernetes dashboard) running in a Kubernetes cluster using infrastructure as code practices to allow you to spin up and manage this whole setup through terraform and ansible.
The end-state Kubernetes cluster we will be creating will have some developer-focused tools deployed which will be described in more detail in part 4. All tools are deployed from code.
Series Notes
To keep this series managable, I will skip over basics of why and how to use tools like terraform and ansible - this series will jump right in using the tools. If you are coming without a basic understanding of those tools, I would suggest running through some tutorials. There are fantastic write ups for those elsewhere.
This is a walkthrough that is meant to be adapted to your network design and hardware. It is best suited for those that have a single homelab machine where ESXi will be installed directly on the hardware and a vCenter instance will be started up within the ESXi host. Also, it should go without needing to say it, but this is not production grade - things like valid tls certificates are not included.
This guide
At the end of this guide, we will have 4 Ubuntu virtual machines created through the vSphere provider. To keep things defined as code, we will be using cloud-init in Ubuntu cloud images to allow us to pass in configuration like our OS user accounts, hostname, ssh keys, and storage mount points. For an overview of the hardware we are using, please see Infrastructure Overview from part 1.
All this configuration will be managed through terraform templates. Let's get started.
Guide
- Get companion code
- Creating a template virtual machine
- Rebuilding cloud-init in ubuntu images
- About the terraform plan
- Apply the Terraform Plan
- (optional) Verify a few things
- Wrap Up
Get companion code
The code this guide uses is available at https://github.com/markperdue/vsphere-vm-cloud-init-terraform. Clone the companion code repo to have the best experience following along.
Creating a template virtual machine
As of December 2022, there is an issue that leads to guestinfo not being properly passed to cloud-init during startup of the virtual machine for, at least, Ubuntu images. To work around this, we need to reconfigure cloud-init for our template image.
- Download the OVA image of the desired Ubuntu release. As of writing, that is 22.04 jammy
- Verify the sha256 checksum of the downloaded image against the stated checksum. As this image is regularly updated, the checksum you see will likely be different than the checksum below which is for the image published on 2022-12-01
$ sha256sum ubuntu-22.04-server-cloudimg-amd64.ova 2bacf5305c4a09ad16919ac794b5420a01154b4b957095582a96e5d6161089ee ubuntu-22.04-server-cloudimg-amd64.ova - Launch the vcsa-01 instance we created in part 1 of the series and login with the same credentials used previously. If those were not changed for this lab, they are
administrator@vsphere.localandchangethisP455word! - Expand the
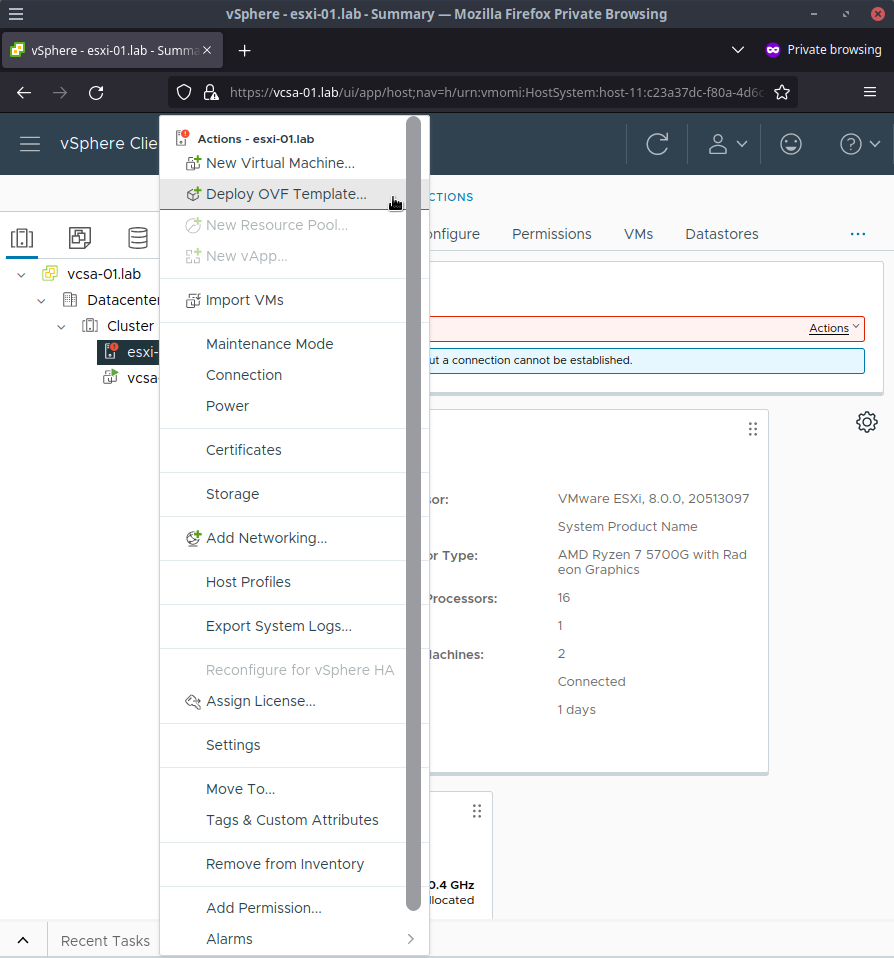
vcsa-01.lablisting in the Datacenter tab to show theesxi-01.labhost item - Right click on
esxi-01.laband clickDeploy OVF Template
- Select
Local fileand use the file picker from clickingUpload Filesto find theubuntu-22.04-server-cloudimg-amd64.ovafile and clickNext - Enter a unique name for the
virtual machine namefield such asubuntu-jammy-22.04-cloudimg-20221201which is based off of the release date of the ubuntu image I had downloaded and clickNext - Click through the compute resource screen making sure your
esxi-01.labhost is selected by clickingNext - On the review details page click
Next - Select the storage you have available for this VM as well as the disk format. I keep it with the default of
Thick Provision Lazy Zeroedand clickNext - On the networks screen, click
Next - For the customize templates screen, click
Next - Click
Finishon the final confirmation screen - After a few moments, the OVF template should be deployed into vSphere
Rebuilding cloud-init in ubuntu images
As mentioned previously, there is a small issue preventing us from using cloud-init properly through terraform in the ubuntu images. This prevents the guestinfo we define in terraform from making it into the VM which breaks our configuration goals. To fix this we need to reconfigure cloud-init.
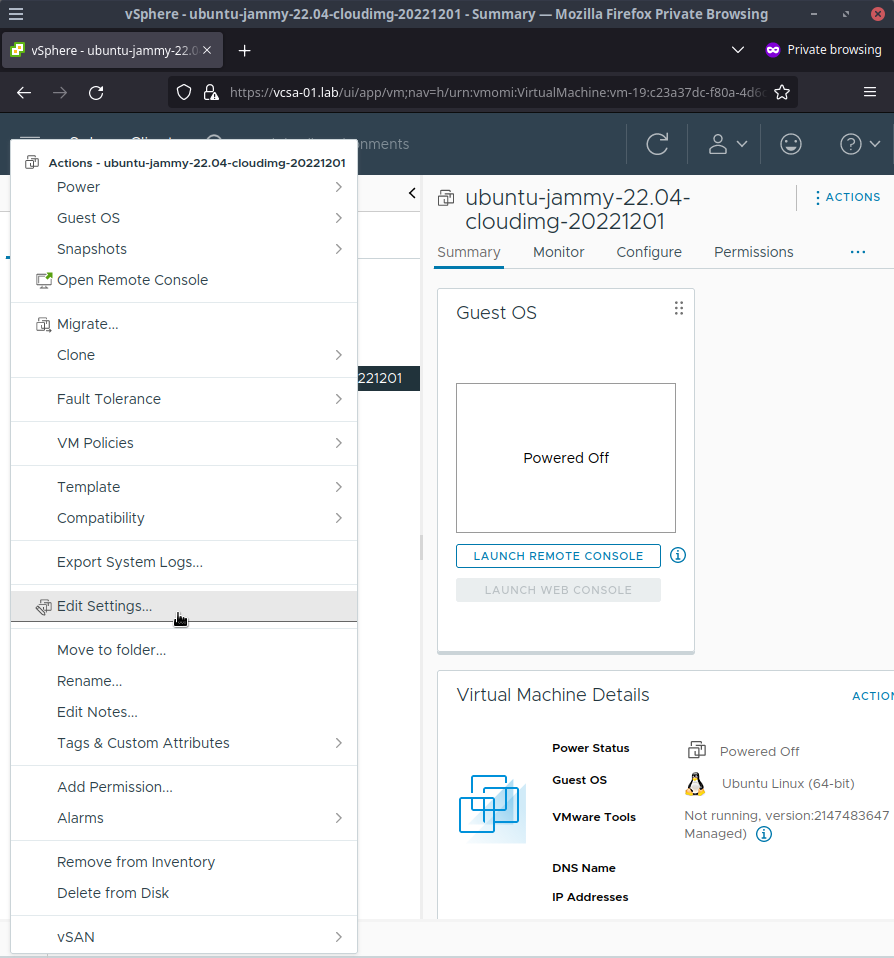
- Right click on the
ubuntu-jammy-22.04-cloudimg-20221201item and clickEdit Settings...
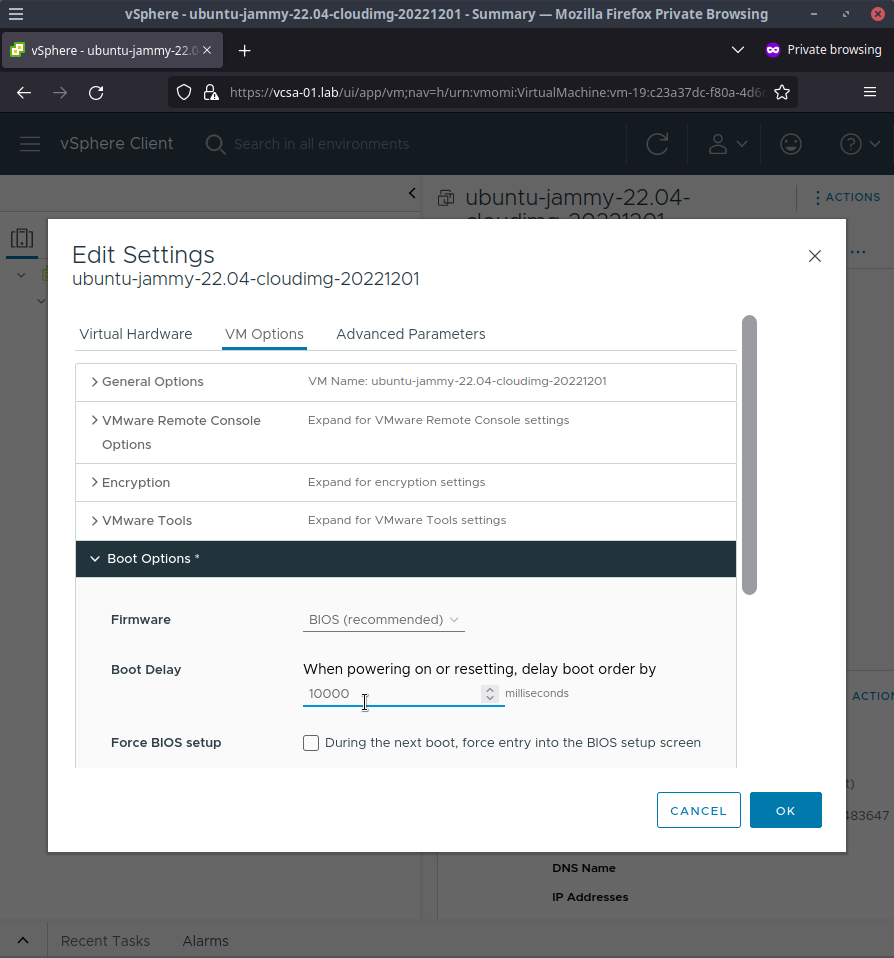
- Click the
VM Optionstab and expandBoot Options - Set the
Boot Delayto10000milliseconds to give us enough time to get into a recovery session shortly
- Click
OKto save changes - Click on the
ubuntu-jammy-22.04-cloudimg-20221201listing to display its properties in the main window - Click
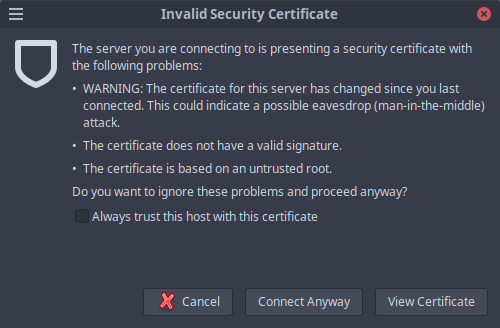
Launch Remote Console(if you do not have this tool installed see the tooltip for information on installing it) - Accept the security warning that shows up since we aren't using any certificates
- In the VMWare Remote Console window, click the
Virtual Machinemenu item and clickPower>Power On
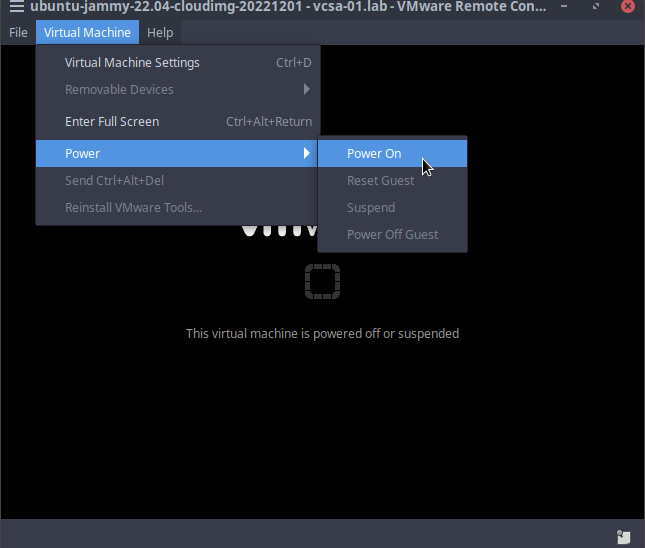
- Immediately click into the Remote Console window so your keystokes are captured by the VM and hold down the
Shiftkey
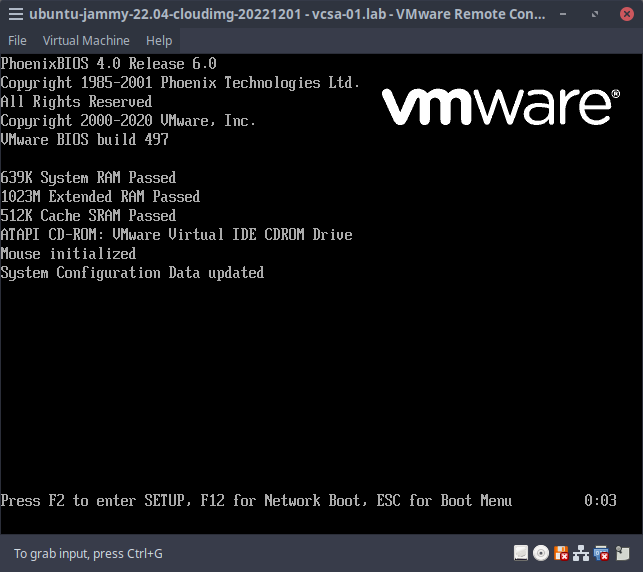
- The grub menu should be displayed and select
Advanced options for Ubuntu
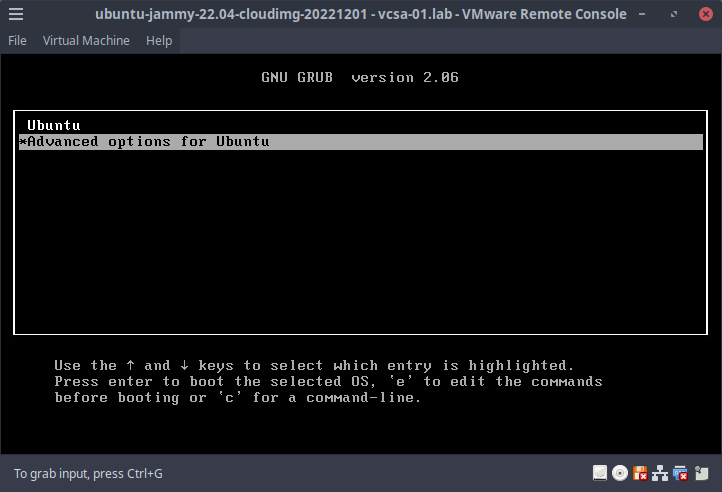
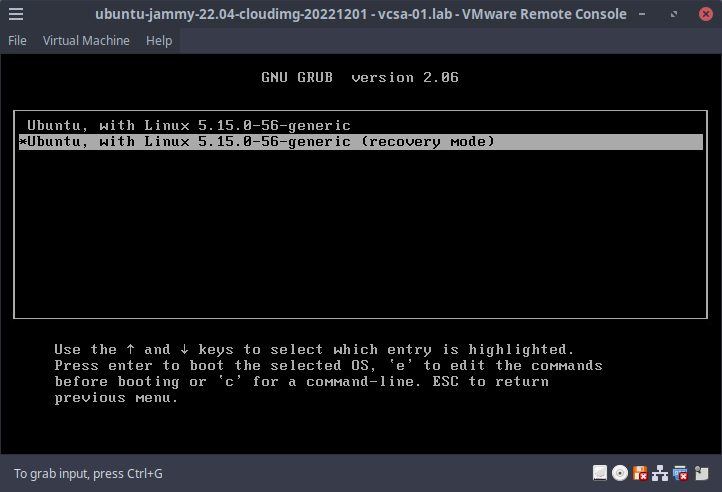
- In the grub menu, select the option that lists
(recovery mode)at the end
- Select
root Drop to root shell promptfrom the recovery menu - Press enter to enter maintenance mode as instructed
1.From the shell prompt, typedpkg-reconfigure cloud-initroot@ubuntu:~# dkpg-reconfigure cloud-init - Unselect all the data sources except
VMwareandNone, hit tab to select<OK>and hit enter to save changes
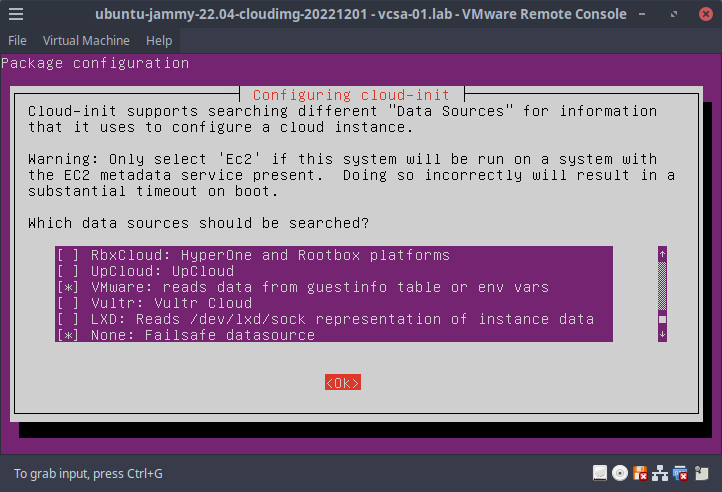
- Type
cloud-init cleanroot@ubuntu:~# cloud-init clean - Shutdown the VM with
shutdown -h nowroot@ubuntu:~# shutdown -h now - Back in vCenter, right click on the
ubuntu-jammy-22.04-cloudimg-20221201item and clickEdit Settings... - Edit the
Boot Delayback to0milliseconds in theVM Options>Boot Optionspage and clickOK - Right click on
ubuntu-jammy-22.04-cloudimg-20221201and clickTemplate>Convert to Template
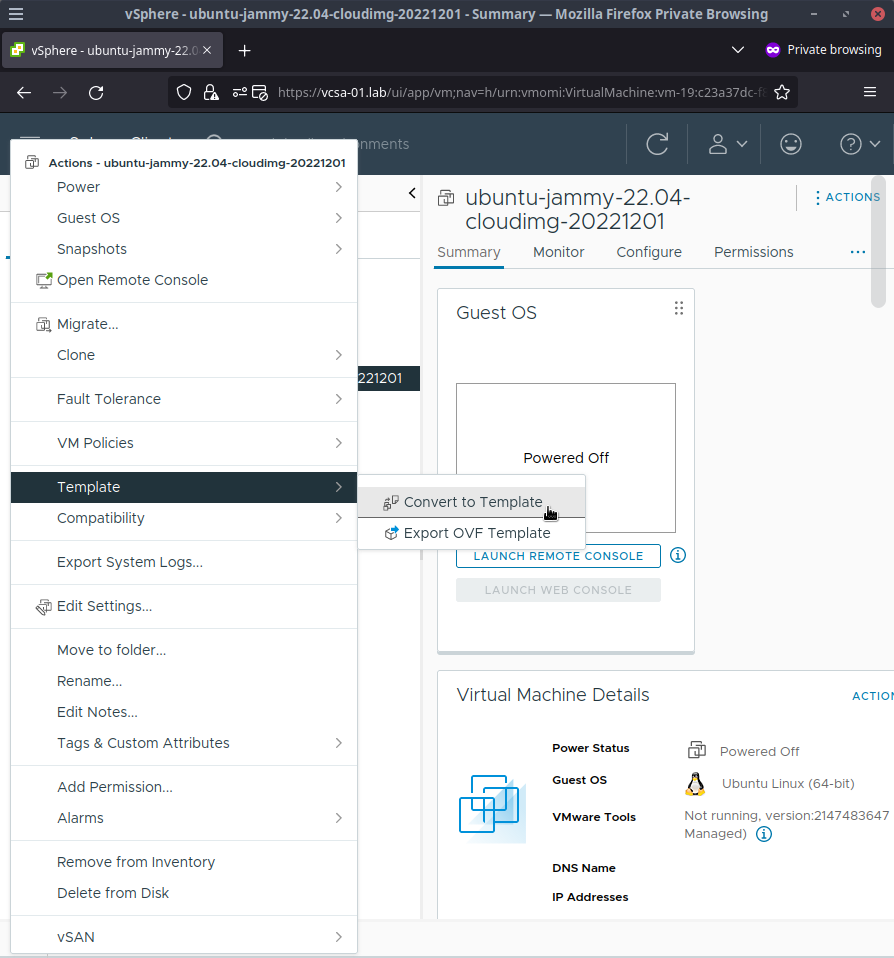
- Click
Yesto the screen about confirming conversion
Now everything is set for us to use this template as the basis for all our Kubernetes VMs in the terraform plan.
About the terraform plan
I have created a terraform plan that we can use to create the 4 VMs for our Kubernetes cluster. This plan is the companion code mentioned earlier so it should already be locally available. The main configuration for this plan is exposed as a tfvars file with the defaults matching the infrastructure design of this walkthrough.
The plan is pretty simple and it uses the vsphere_virtual_machine to create, in our case, the 4 virtual machines we need. The tfvars file we will be using with terraform apply has sane defaults per machine for our setup which are:
- 2 cpu
- 4GB memory
- 20GB primary disk
- 10GB additional disk (for Longhorn in our homelab)
Since this is config-as-code, the values are customizable by you to whatever makes sense for your hardware. But be careful going smaller - less than 2 cpu and 2GB of memory per machine will likely lead to performance issues with Kubernetes.
Customizing the plan - terraform.tfvars
This config requires at least 1 required change to get this all going before being applied -
For security reasons, ssh logins require ssh authorized keys instead of username/password combos. What this means for you is that you will need to edit examples/kubernetes/terraform.tfvars before applying it in the next step and change the value my_ssh_authorized_key with your public ssh key which is commonly at a location like ~/.ssh/id_ed25519.pub or some other .pub extension. The terraform plan accepts multiple public keys so if you have more than one key you would like to allow for sshing into the VMs, add them in the format ssh_authorized_keys = ["key1", "key2", ...]
All the other values are fine left as they but they are customizable and should be (hopefully) self explanatory.
Reference terraform.tfvars file at terraform.tfvars
Customizing the plan - userdata.tftpl
This config file is the payoff for all that cloud-init reconfigure stuff earlier and does not need any changes for our walkthrough. This template file gives us the entrypoint to control cloud-init in our VMs. This file is a bit harder to understand at a glance since it uses specific cloud-init options but cloud-init is well documented which might help.
At a high level, terraform is going to process this template file and resolve all the variables to some of the values from the terraform.tfvars file earlier. On the startup of each of the 4 VMs, cloud-init will run and:
- create OS user
appuserwith our ssh authorized keys - set the VM's hostname to the expected value (e.g.
c1-cp1.lab) - creates an additional mount point at
/var/lib/longhornwith ownership permissions for ourappuser:appowneruser which we will use in the final part of the series for our persistent storage class in Kubernetes using Longhorn
Reference userdata.tftpl file at userdata.tftpl
Apply the plan
- Open a terminal and navigate to the location of where you cloned the companion code repo
- Let's create a terraform workspace to more easily seperate things with
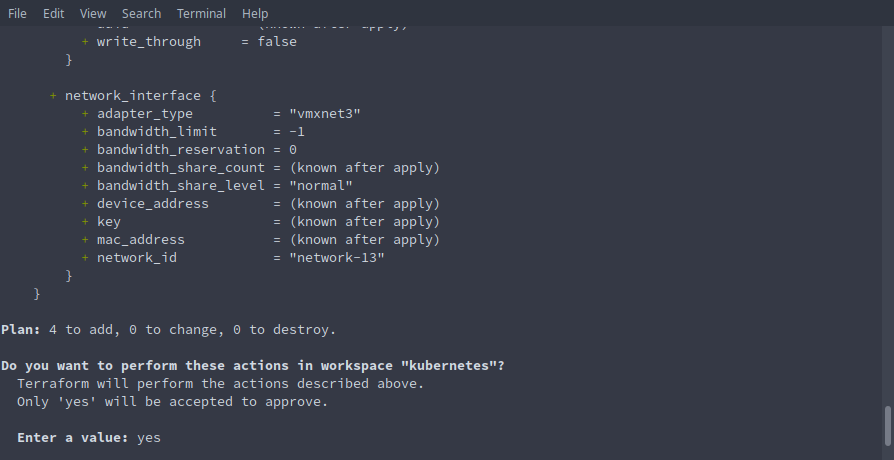
terraform workspace new kubernetes$ terraform workspace new kubernetes Created and switched to workspace "kubernetes"! You're now on a new, empty workspace. Workspaces isolate their state, so if you run "terraform plan" Terraform will not see any existing state for this configuration. - Run
terraform initto pull in any providers and get things setup$ terraform init Initializing the backend... Initializing provider plugins... - Reusing previous version of hashicorp/vsphere from the dependency lock file - Using previously-installed hashicorp/vsphere v2.0.2 Terraform has been successfully initialized! You may now begin working with Terraform. Try running "terraform plan" to see any changes that are required for your infrastructure. All Terraform commands should now work. If you ever set or change modules or backend configuration for Terraform, rerun this command to reinitialize your working directory. If you forget, other commands will detect it and remind you to do so if necessary. - Apply the plan with
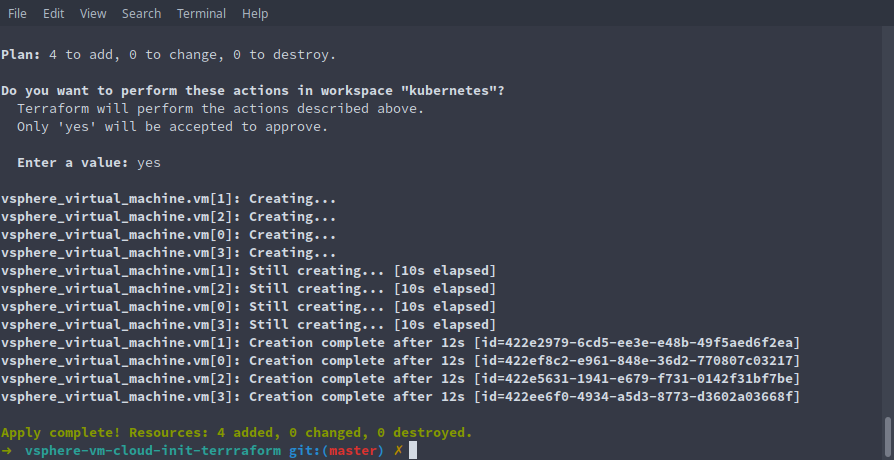
terraform apply --var-file=examples/kubernetes/terraform.tfvars - Type
yesto the prompt to apply the plan
- After a minute or two, terraform should report that our 4 virtual machine resources have been created
(optional) Verify a few things
If you have not used cloud-init much, it is neat to just see that all the things we defined in config worked. You can ssh into one of the machines to do some spot verification of this.
- ssh into
c1-cp1using either the ip or fqdn (fqdn must be added to your dns server for that to work)ssh appuser@192.168.2.21 - Enter
yesto the trust warning of the node as we have not connected to this node before and hit enterThe authenticity of host '192.168.2.21 (192.168.2.21)' can't be established. ED25519 key fingerprint is SHA256:some_unique_value_here_for_your_setup. This key is not known by any other names. Are you sure you want to continue connecting (yes/no/[fingerprint])? yes Warning: Permanently added '192.168.2.21' (ED25519) to the list of known hosts. - We can verify some of what cloud-init setup by seeing our expected user is
appuserand the group info isappownerappuser@c1-cp1:~$ id uid=1000(appuser) gid=1000(appowner) groups=1000(appowner),27(sudo),100(users),118(admin) - Verify the hostname is
c1-cp1.labappuser@c1-cp1:~$ hostname -f c1-cp1.lab - Verify the mount point was added
appuser@c1-cp1:~$ cat /etc/fstab
LABEL=cloudimg-rootfs   /        ext4   discard,errors=remount-ro       0 1
LABEL=UEFI      /boot/efi       vfat    umask=0077      0 1
/dev/sdb1       /var/lib/longhorn       ext4    defaults,nofail,comment=cloudconfig     0       0
Looking good!
Wrap Up
At this point, all 4 virtual machines are prepped and ready for the next part of the series where we install Kubernetes using ansible.
Catch the next part of the series at Installing your Kubernetes homelab cluster in minutes with Ansible